Many dog owners dread the tiny yet troublesome issue of ticks. A common myth suggests that ticks only pose a threat in rural areas or during certain seasons. However, ticks can be a year-round menace regardless of your location. Understanding how to remove a tick from a dog isn’t just about aesthetics; it’s crucial for your dog’s health and wellbeing. Neglecting proper tick removal on your dog can lead to serious health concerns, including Lyme disease and other tick-borne illnesses.
Another misconception is that ticks are easy to spot. In reality, these parasites can be tricky to identify and even harder to remove correctly. If you’re wondering how to get a tick out of a dog safely, it’s essential to follow a proper method. This article will guide you through the steps you need to know, ensuring effective and safe removal.
Why Is Tick Removal on Dogs Important?
Ticks are more than just a nuisance; they are vectors for various diseases that can have a significant impact on your dog’s health. By ensuring effective tick removal on your dog, you reduce the risk of transmitting infections like Lyme disease, anaplasmosis, and ehrlichiosis. These conditions can lead to severe symptoms such as fever, joint pain, and fatigue. Moreover, ticks can cause skin irritation and infection at the site of attachment, further emphasizing the importance of prompt and correct removal.
How to Identify a Tick on Your Dog
Identifying a tick on your dog requires careful inspection. These parasites are often mistaken for skin tags or small lumps. Ticks vary in size, starting as small as a pinhead and growing larger as they feed. They have eight legs and a hard shell, which can make them difficult to detect, especially in thick fur. Regularly checking your dog, especially after outings in wooded or grassy areas, is essential. Running your hands over their body, paying close attention to warm, hidden areas such as under the collar and between the toes, can help you spot ticks early.
Step-by-Step Guide: How to Safely Remove a Tick from a Dog
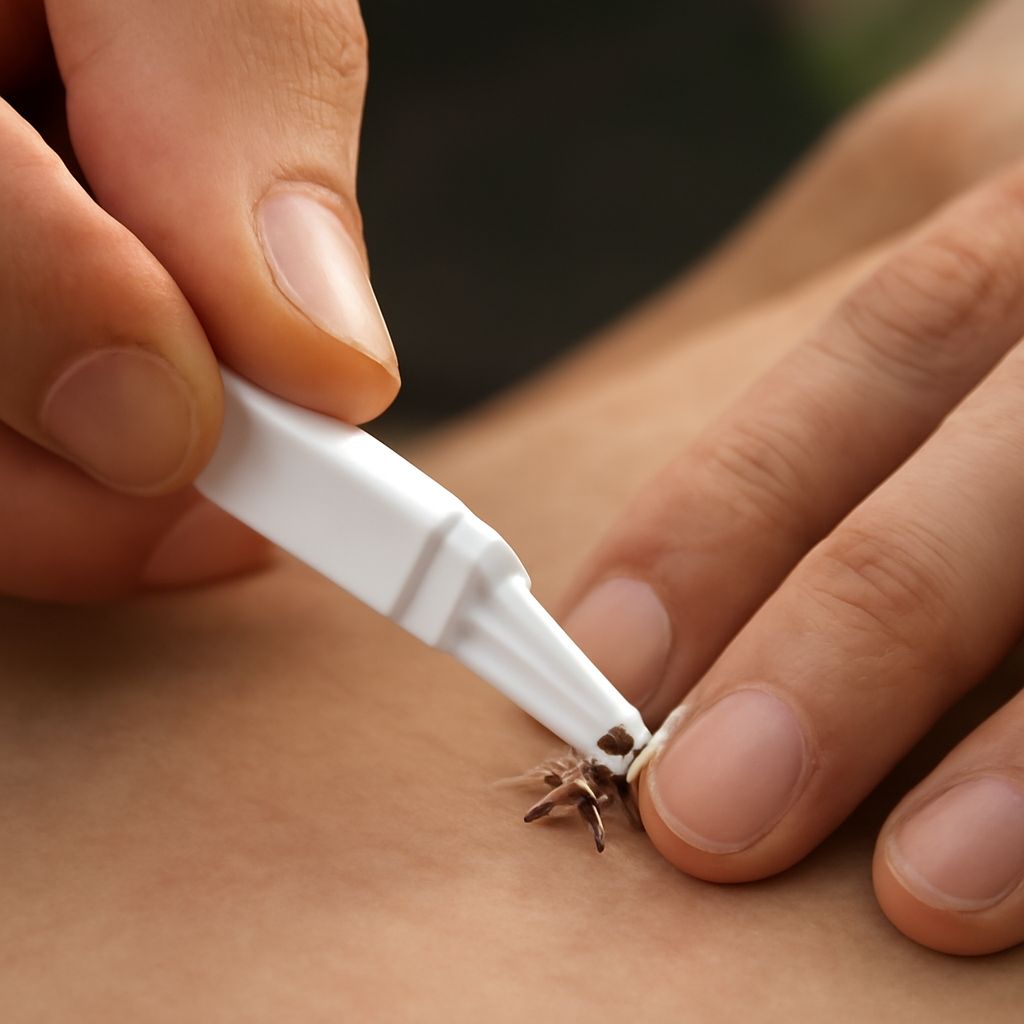
The correct method to get a tick out of a dog involves patience and precision. Use fine-tipped tweezers or a tick removal tool for the best results. First, wear gloves to protect yourself. Grasp the tick as close to the dog’s skin as possible, ensuring you don’t squeeze the body. Gently pull upward with steady pressure. Avoid twisting or jerking, which can cause the mouthparts to break off and remain in the skin. After removal, clean the bite area with antiseptic. Always wash your hands thoroughly after handling ticks.
Aftercare: What to Do After Removing a Tick from Your Dog
Once you’ve successfully removed a tick, it’s important to monitor your dog for any signs of infection or illness. Look for redness, swelling, or oozing at the bite site, which could indicate an infection. Keep the removed tick in a sealed container with rubbing alcohol in case it needs to be identified later for disease testing. If your dog shows symptoms like lethargy, loss of appetite, or fever, consult your veterinarian immediately. These could be signs of a tick-borne disease that requires medical attention.
Bottom line: Properly removing a tick from your dog is vital for their health. Always use the correct tools and technique to ensure complete removal. Regular checks and prompt action can prevent the serious health issues associated with tick bites. For any complications or uncertainties, don’t hesitate to reach out to your veterinarian for guidance.